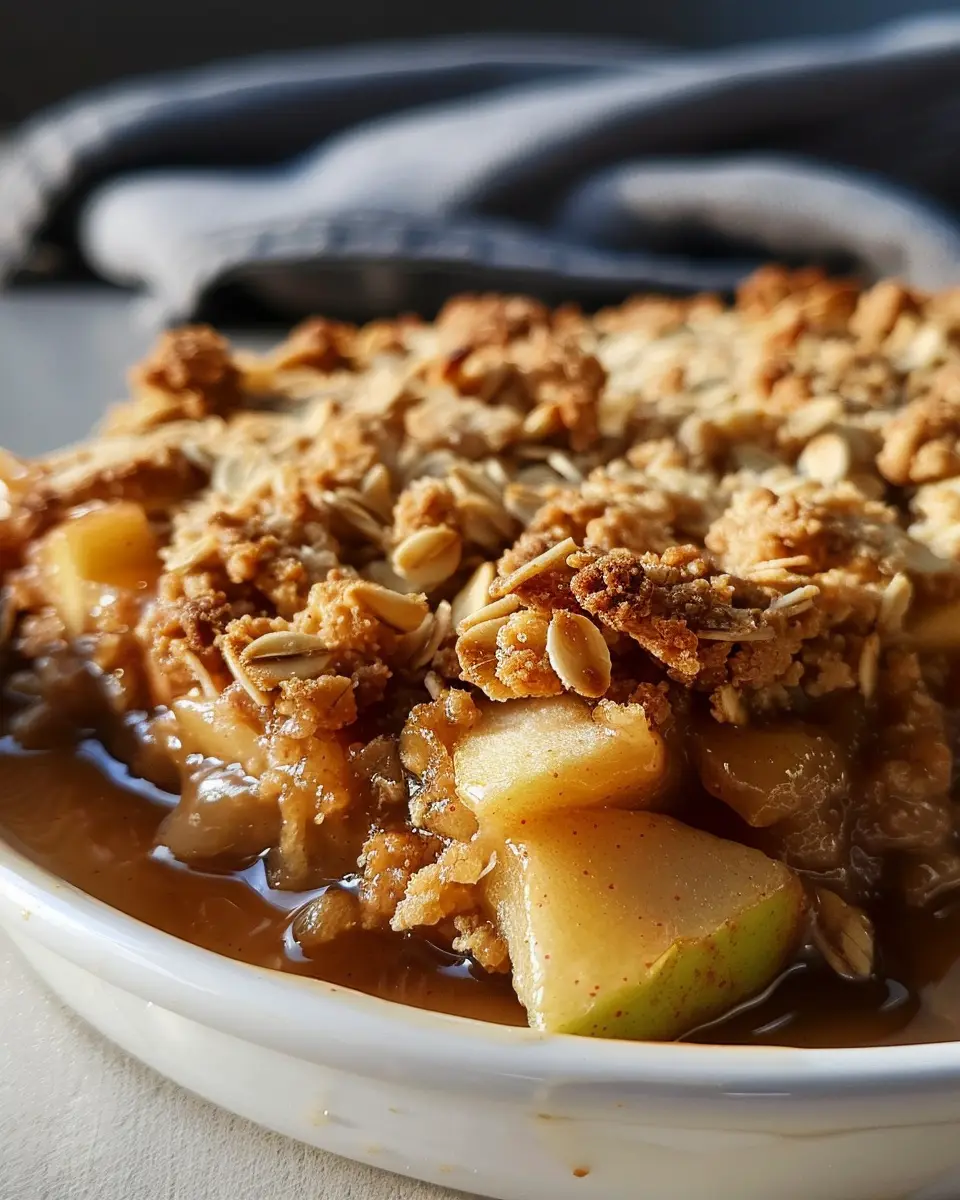
Introduction to Classic Apple Crisp
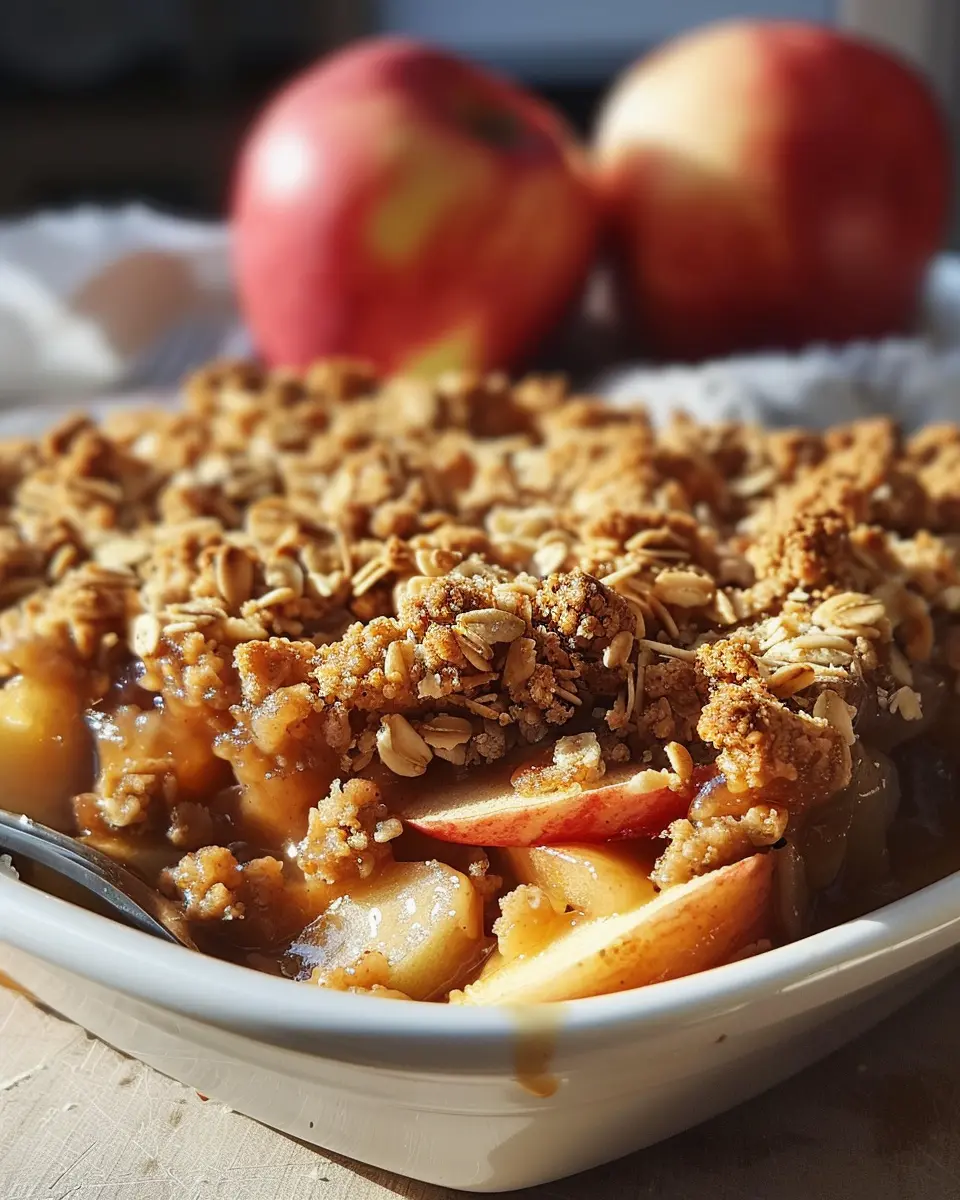
Classic apple crisp is often regarded as the ultimate comfort dessert, and for good reason. Imagine cozying up on a chilly evening, the sweet aroma of warm cinnamon and baked apples wafting through your home. This delightful dessert combines tender apples with a crunchy topping made of oats, butter, and sugar, creating a mouthwatering contrast that satisfies your sweet tooth while also bringing a sense of nostalgia.
Why Apple Crisp is the Ultimate Comfort Dessert
Apple crisp is more than just a dish; it’s an experience that evokes cherished memories. For many, it invokes images of family gatherings, autumn harvests, and lazy Sunday afternoons filled with laughter and good food. According to a survey by the American Pie Council, 16% of respondents prefer fruit desserts over other options, with flavors like apple leading the charge.
The beauty of classic apple crisp lies in its simplicity. It requires minimal ingredients, making it accessible for even the busiest young professionals looking for a quick yet satisfying treat. All you need are fresh apples, which are readily available at local farmers’ markets or grocery stores, and a few pantry staples like oats, flour, and butter. This ease of preparation means that whipping up a batch of apple crisp can transform an ordinary night into a special occasion.
Another enticing aspect of apple crisp is its versatility. You can customize the recipe to suit your taste, adding ingredients like nuts or dried fruits, or experimenting with different apple varieties. For example, Granny Smith apples offer a tartness that beautifully balances the sweetness of the crisp topping. You can find more ideas on customizing desserts at renowned culinary sources like Serious Eats or Food Network.
Not only is classic apple crisp delicious, but it’s also a wholesome choice when made with fresh ingredients. It’s a dessert that invites sharing and gathering, which is what makes it truly special. So gather your friends, grab some apples, and let’s dive into the process of making this comforting dish!
Ingredients for Classic Apple Crisp
Essential ingredients for your crisp creation
When whipping up a delightful classic apple crisp, it all starts with the right ingredients. For a satisfying base, you’ll need:
- Apples: Choose a mix of tart and sweet varieties like Granny Smith and Honeycrisp for depth of flavor.
- Brown Sugar: Adds a rich, caramel-like sweetness that enhances the apples.
- Oats: Rolled oats provide texture and heartiness to the crisp topping.
- Flour: All-purpose flour or whole wheat flour works well to bind the topping together.
- Butter: Use unsalted butter for that creamy richness.
- Cinnamon: A sprinkle of cinnamon adds warmth and comfort to your dish.
Optional ingredients for customization
Feeling adventurous? You can customize your classic apple crisp with these options:
- Nuts: Chopped walnuts or pecans for extra crunch.
- Spices: A dash of nutmeg or ginger can add a unique twist.
- Fruits: Consider mixing in berries or pears for a fruity explosion.
- Sweeteners: Substitute honey or maple syrup for a different sweet profile.
With these ingredients, you’re well on your way to creating a comforting dessert that’s perfect for any occasion! Want more tips on sourcing quality apples? Check out this guide on selecting the best varieties.
Preparing Classic Apple Crisp
Making a classic apple crisp is an enjoyable and rewarding experience that invites the warmth of home into your kitchen. This delicious dessert combines tart apples with a sweet, crumbly topping, making it a perfect treat for any occasion. Ready to dive in? Let’s break it down into simple steps!
Step 1: Preheat your oven
Before you even think about preparing the ingredients, it’s time to preheat your oven to 350°F (175°C). Getting your oven hot while you prepare the ingredients ensures your crisp will bake evenly and turn out perfectly golden brown. A well-preheated oven can significantly impact the final texture of your dessert, making it essential for baking any classic apple crisp.
Step 2: Prepare the apples
Next up, let’s focus on the stars of the show—the apples! For a truly classic apple crisp, you’ll want to choose a combination of sweet and tart apples. Varieties like Honeycrisp, Granny Smith, or Fuji can work wonders. Here’s how to get them ready:
- Peel and core the apples using a vegetable peeler and an apple corer or a knife.
- Slice the apples into thin, even wedges. Aim for about 1/4 inch thick to ensure they cook properly.
- Combine the sliced apples in a large mixing bowl and add:
- 1 tablespoon of lemon juice (this helps to keep their vibrant color)
- 1/2 cup of granulated sugar
- 1 teaspoon of ground cinnamon
- A pinch of nutmeg, if you like a hint of warmth in your flavor.
Toss everything together until the apples are well-coated. The sweetness of the sugar and the brightness from the lemon juice works wonders in enhancing the natural flavors of the fruit.
Step 3: Make the oat topping
Now, let’s whip up the crunchy topping that makes this classic apple crisp sing! A great topping is key to achieving that perfect contrast between soft apples and a crispy, buttery layer. Here’s what you’ll need:
-
In a medium bowl, mix together:
-
1 cup rolled oats
-
1 cup all-purpose flour
-
1/2 cup packed brown sugar
-
1/2 teaspoon salt
-
1/2 teaspoon ground cinnamon
-
Next, cut in 1/2 cup of cold, unsalted butter using a pastry cutter or your fingers until the mixture resembles coarse crumbs. Don’t be afraid to get your hands in there; it’s fun!
This topping will create a delightful crunch as it bakes.
Step 4: Assemble the dessert
With your apples ready and the topping made, it’s time to assemble your classic apple crisp. In a greased 9×13-inch baking dish, layer the apple mixture evenly across the bottom. Then, sprinkle the oat topping generously over the apples. Make sure to cover every inch for that gorgeous, rustic look!
Step 5: Bake to golden perfection
Now for the best part: baking! Place your assembled dessert in the preheated oven and set a timer for 30 to 35 minutes. You’re looking for that coveted golden-brown color on top. The aroma of the baking classic apple crisp will fill your kitchen, tempting everyone around. To check for doneness, pierce the apples with a fork; they should be tender but not mushy.
Once perfectly baked, let it cool for about 10 minutes before serving. This short wait amplifies the flavor and makes it easier to serve. Pair it with vanilla ice cream or whipped cream for an added treat.
Now you’re equipped to create a classic apple crisp that’ll impress not just your taste buds, but those of friends and family alike! Enjoy your creation, and don’t forget to share your experience or any variations you try!
Variations on Classic Apple Crisp
Gluten-free Options for Everyone
For those who follow a gluten-free lifestyle, you don’t have to miss out on the joys of a classic apple crisp! Simply swap out regular oats for certified gluten-free oats and choose a gluten-free flour blend for the topping. You can also use almond flour for a delicious nutty flavor. This way, everyone at your table can indulge without worry. If you’re interested in more gluten-free tips, sites like Celiac Disease Foundation offer fantastic resources.
Add-ins and Flavor Twists
One of the wonderful things about classic apple crisp is its versatility. Why not experiment with add-ins to elevate the flavor profile? Here are some ideas to get you started:
- Nuts and seeds: Chopped walnuts, pecans, or even sunflower seeds can add a delightful crunch.
- Spices: Try adding a pinch of cardamom or a dash of vanilla extract for a fresh twist that complements the apples beautifully.
- Fruit variations: Combine your apples with pears or berries for a mixed fruit crisp that’s bursting with flavor.
- Crisp toppings: Consider adding coconut flakes or a drizzle of honey on top of your crumble for a touch of sweetness.
Personalize your crisp using whatever you have on hand, and watch how each variation creates a unique dessert! For a deeper dive into flavor combinations, check out The Joy of Cooking, where they explore endless ways to get creative in the kitchen.
Next time you whip up this beloved dessert, think outside the box and give these suggestions a try. Happy baking!
Cooking tips and notes for Classic Apple Crisp
Tools to make your baking easier
When diving into the world of classic apple crisp, having the right tools can make all the difference. Here are some essentials you might want to gather:
- Baking Dish: Opt for a 9×13 inch dish for even cooking.
- Mixing Bowls: A couple of medium-sized bowls help with ingredient prep.
- Knife and Cutting Board: Sharp knives make peeling and slicing apples a breeze.
- Pastry Blender: This handy tool can help you achieve that perfect crumbly topping.
Common mistakes to avoid
Even seasoned bakers can stumble when making a classic apple crisp. Here’s what to watch out for:
- Choosing the wrong apples: Stick to tart varieties like Granny Smith for optimal flavor.
- Skipping the spice: Don’t underestimate cinnamon. It adds depth to your dish.
- Making it too soggy: Drain excess liquid from the apples before baking to avoid a watery crisp.
By paying attention to these details, you’ll whip up an apple crisp that impresses every time! For more tips, check out resources from The Kitchn and Bon Appétit.

Serving suggestions for Classic Apple Crisp
Top it off with delicious accompaniments
When it comes to enjoying your classic apple crisp, the right accompaniments can elevate it to new heights! Here are some delightful options to consider:
- Vanilla Ice Cream: A scoop of rich vanilla ice cream melts beautifully over warm apple crisp, creating a delightful contrast of temperatures and flavors.
- Whipped Cream: Light and airy, a dollop of freshly whipped cream adds an elegant touch and balances the sweetness of the apples.
- Caramel Sauce: Drizzling warm caramel sauce on top can enhance the dish with a luscious, gooey sweetness.
Creative ways to serve
Looking to impress? Consider these fun serving ideas for your classic apple crisp:
- Individual Portions: Serve in ramekins for single servings—perfect for dinner parties or cozy nights in.
- Breakfast Treat: Consider warming it up and serving with a splash of milk or yogurt for a delicious breakfast twist.
- Add Nuts: Top with chopped pecans or walnuts for a crunchy texture contrast that adds a nutty flavor to every bite.
Choosing the perfect side can transform your dessert experience. For more serving ideas, check out sources like The Spruce Eats or Food Network for inspiration and variations!
Time Details for Classic Apple Crisp
Preparation Time
Creating a delightful classic apple crisp takes about 15-20 minutes of hands-on prep. This includes peeling, coring, and slicing the apples—you can choose your favorite variety like Granny Smith or Honeycrisp for that perfect mix of tartness and sweetness. If you’re feeling adventurous, consider adding a pinch of cinnamon or nutmeg for an extra flavor boost!
Baking Time
Once it’s in the oven, let it bake for about 30-35 minutes at 350°F (175°C). You’ll know it’s ready when the top turns golden brown and the apples are bubbly. The aroma will have your kitchen smelling like autumn!
Total Time
All in all, you’re looking at roughly 50-60 minutes from start to finish. Perfect for a cozy evening dessert or a potluck gathering. Just think, with such a straightforward timeline, you can whip up this classic apple crisp in no time! 🍏
For expert tips on making the perfect apple crisp, you can check out resources from The Kitchn or Serious Eats.
Nutritional Information for Classic Apple Crisp
Calories and Macronutrients
When you indulge in a classic apple crisp, you’re treating yourself to a delightful dessert that is generally considered a comfort food favorite. A typical serving contains approximately 200-250 calories, primarily sourced from carbohydrates and healthy fats. Here’s a quick breakdown of its macronutritional profile:
- Carbohydrates: Around 40g
- Fat: About 8-10g (depending on how much butter you use)
- Protein: Roughly 2g
This makes it a great option for those looking for a sweet treat without going overboard on calories. Just think about pairing it with a scoop of low-fat vanilla ice cream for a balanced dessert experience!
Allergen Information
As you enjoy your freshly baked classic apple crisp, be mindful of common allergens present in the ingredients:
- Gluten: Found in traditional rolled oats and flour. You can easily substitute these with gluten-free options.
- Nuts: Some recipes may call for nuts, which can trigger allergies in sensitive individuals.
- Dairy: The recipe generally contains butter, so opt for alternatives like coconut oil for a dairy-free version.
Always check labels or consult with guests to ensure everyone can safely enjoy this delicious treat! For more personalized nutrition advice, consider checking resources like the U.S. Department of Agriculture and Food Allergy Research & Education.
FAQs about Classic Apple Crisp
Can I use other fruits besides apples?
Absolutely! While classic apple crisp typically features apples, it’s wonderfully versatile. You can substitute apples with other fruits like pears, peaches, or berries, creating unique flavor profiles. For example, a pear and cranberry crisp offers a delightful twist that balances sweetness and tartness. Just be mindful of the moisture content; if your chosen fruit is juicier than apples, you might want to reduce added sugar to maintain that perfect texture.
How to store leftovers properly?
Storing your classic apple crisp is a breeze! Allow it to cool to room temperature, then cover it tightly with plastic wrap or aluminum foil. If you’re planning to eat it within a few days, it can stay in the fridge, where it will be good for about 3-4 days. For longer storage, consider freezing it. Just portion it into airtight containers or freezer bags. When you’re ready to enjoy, simply thaw it overnight in the fridge and reheat in the oven for that fresh baked taste!
Is apple crisp better warm or cold?
While personal preference plays a big role, many fans argue that classic apple crisp shines brightest when enjoyed warm. The contrast of the warm, tender apples and the crisp topping creates a comforting experience, especially when paired with a scoop of vanilla ice cream. However, if you prefer it cold, there’s no right or wrong—enjoy it however you like!
For more tips on apple recipes, check out trusted resources like Culinary Institute of America. What’s your favorite way to enjoy apple crisp? 🥧
Conclusion on Classic Apple Crisp
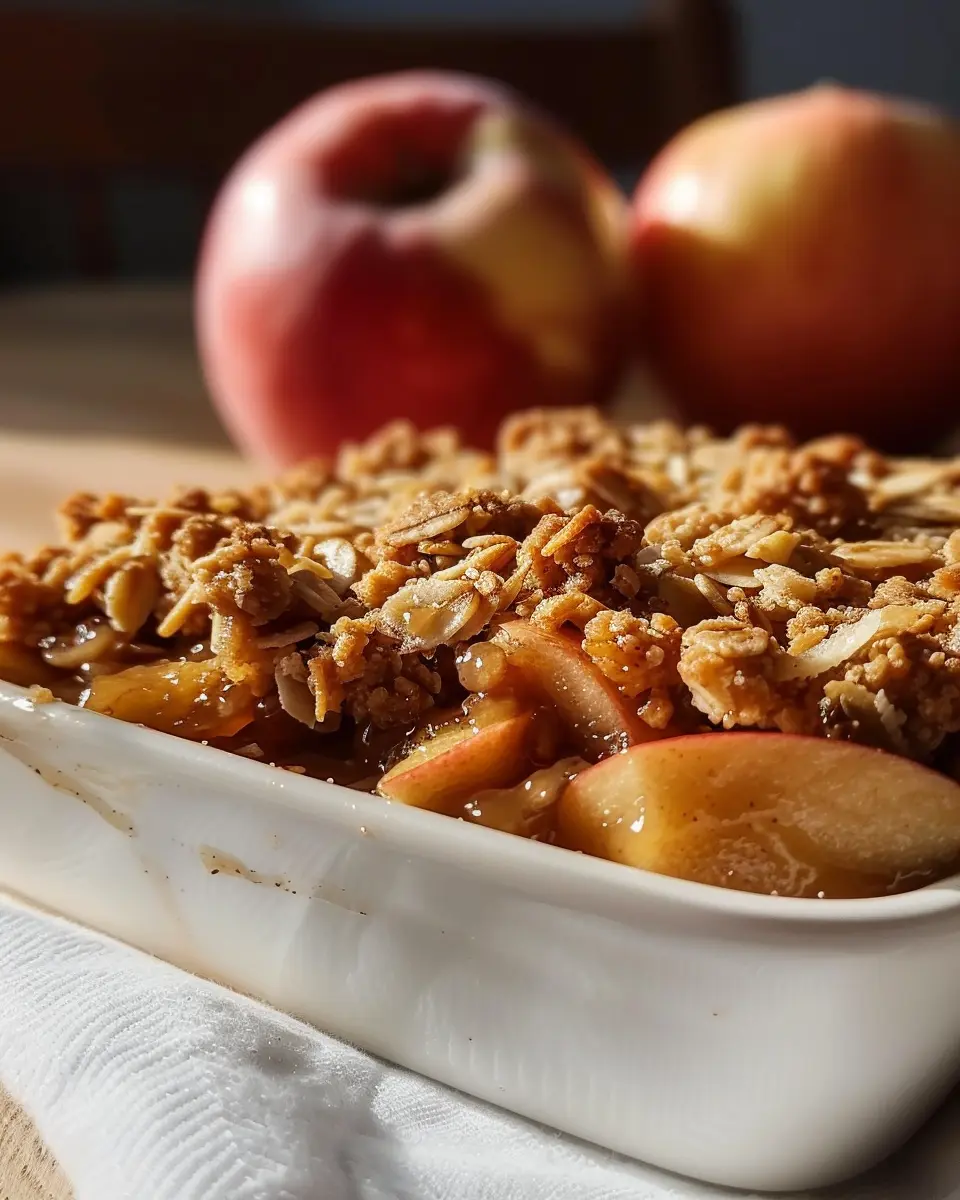
Why You Should Make Apple Crisp Today
There’s never a wrong time to whip up a classic apple crisp! The sweet, comforting aroma that fills your kitchen as it bakes is an instant reminder of autumn, making it a perfect dessert for any occasion. Plus, it requires just a handful of fresh ingredients—like apples, oats, and cinnamon—so why not treat yourself?
Whether you’re looking to impress guests or simply savor a warm dessert after a long day, apple crisp is the ideal choice. And remember, you don’t have to be a master chef to pull it off—anyone can make this delightful dish! So grab your apples and dive in; trust us, you won’t regret it! For more inspiration, check out sites like Food Network or Serious Eats for other delicious treats.
PrintClassic Apple Crisp: Easy, Homemade Delight for Autumn Cravings
A delicious and easy recipe for Classic Apple Crisp, perfect for satisfying autumn cravings.
- Prep Time: 20 minutes
- Cook Time: 35 minutes
- Total Time: 55 minutes
- Yield: 8 servings
- Category: Dessert
- Method: Baking
- Cuisine: American
- Diet: Vegetarian
Ingredients
- 6 cups sliced apples
- 1 cup brown sugar
- 1 cup rolled oats
- 1 cup all-purpose flour
- 1 teaspoon ground cinnamon
- 1/2 cup unsalted butter, softened
Instructions
- Preheat the oven to 350°F (175°C).
- In a large bowl, mix the sliced apples with brown sugar and cinnamon.
- Transfer the apple mixture to a baking dish.
- In another bowl, combine oats, flour, and butter until crumbly.
- Spread the oat mixture over the apples.
- Bake for 30-35 minutes until golden brown.
Notes
- Serve warm with vanilla ice cream for a delightful treat.
- Store leftovers in the refrigerator for up to 3 days.
Nutrition
- Serving Size: 1 cup
- Calories: 250
- Sugar: 15g
- Sodium: 5mg
- Fat: 10g
- Saturated Fat: 5g
- Unsaturated Fat: 3g
- Trans Fat: 0g
- Carbohydrates: 37g
- Fiber: 4g
- Protein: 2g
- Cholesterol: 15mg