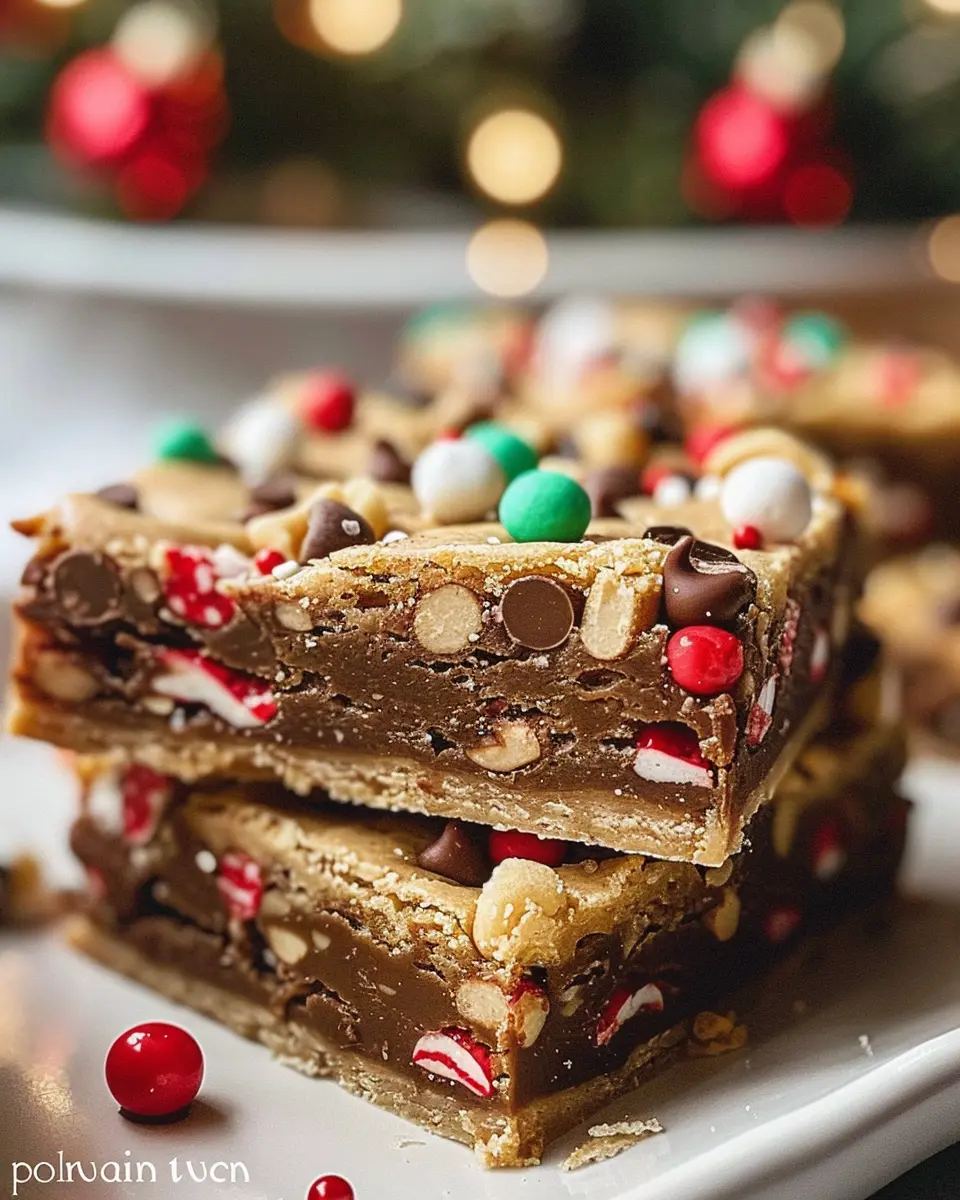
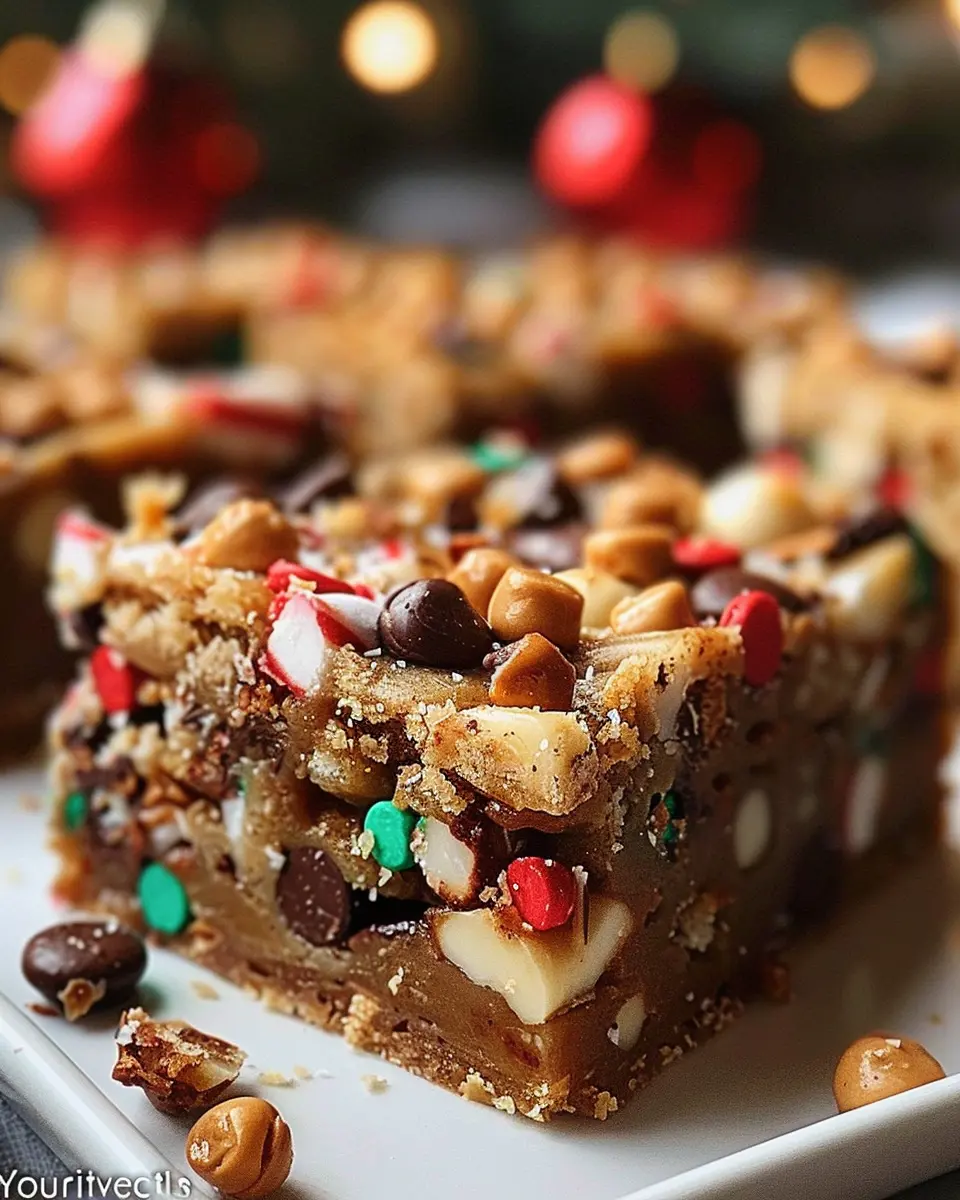
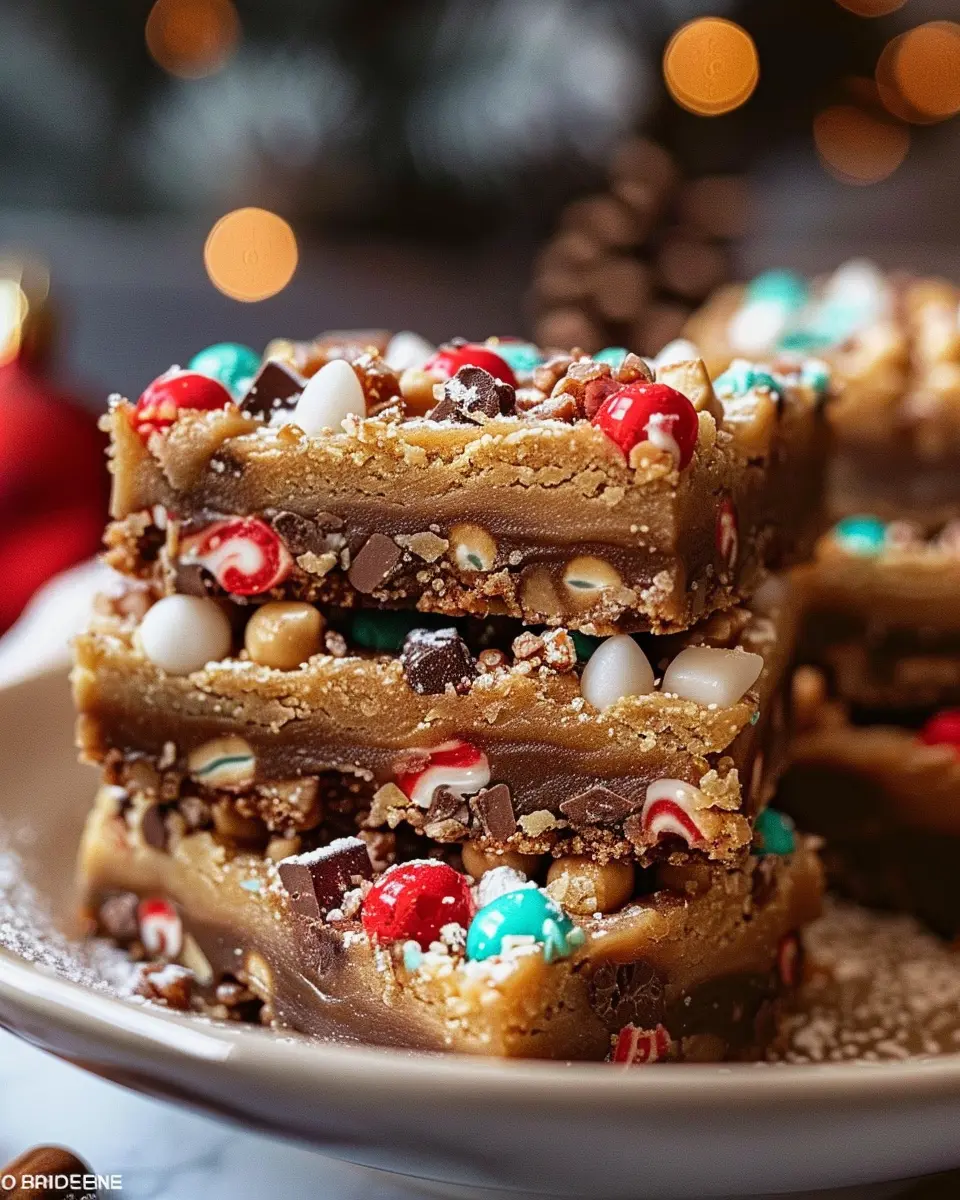
Introduction to Christmas Cookie Bars
The holiday season is a magical time filled with warmth, joy, and of course, delightful treats. One quintessential addition to any Christmas dessert spread is the Christmas Cookie Bars. These delectable treats blend the best features of cookies and bars, creating a chewy, flavorful delight that’s perfect for sharing with friends and family during festive gatherings.
Why Christmas Cookie Bars are a Holiday Must-Have
There are countless reasons why you need Christmas Cookie Bars on your holiday dessert platter. First and foremost, they are incredibly versatile! You can customize them with a variety of mix-ins such as chocolate chips, nuts, or dried fruits. The beauty lies in their adaptability—whether you enjoy peppermint, gingerbread, or rich chocolate flavors, there’s a recipe out there to satisfy your taste buds.
Furthermore, these bars are a breeze to make. Unlike traditional cookies that require chilling dough and rolling out perfect shapes, cookie bars come together in a flash. Just mix your ingredients, pour the batter into a pan, and bake. This simple process allows you to whip up a batch quickly, making them ideal for last-minute holiday parties or cozy nights at home.
You can also make a large batch to cut into lovely squares, which makes serving and sharing a cinch. They are perfect for cookie exchanges, potlucks, or simply enjoying with a warm mug of hot cocoa after a long day. Plus, they store beautifully, so you can prepare them ahead of time and savor them throughout the season.
Did you know that baking can also help boost your mood? Engaging with the process can reduce stress and provide a sense of accomplishment. This study by the Journal of Positive Psychology suggests that engaging in creative activities, such as baking, can promote a sense of well-being.
As the holidays approach, consider adding Christmas Cookie Bars to your culinary repertoire. They might just become a cherished family tradition, filling your home with sweet aromas and heartwarming memories!

Ingredients for Christmas Cookie Bars
Creating Christmas Cookie Bars is as much about the ingredients as it is about the love you put into making them. Let’s gather everything you need for these delicious, festive treats!
Essential Ingredients
- Butter – 1 cup, softened, for a rich base.
- Brown Sugar – 1 cup, packed, to add that wonderful caramel flavor.
- Granulated Sugar – ½ cup, for the perfect balance of sweetness.
- Eggs – 2 large, these will bind everything together smoothly.
- Vanilla Extract – 2 teaspoons, because what are cookies without a touch of vanilla?
Dry Ingredients
- All-Purpose Flour – 2 cups, the main structure of your cookie bars.
- Baking Powder – 1 teaspoon, to give them a lovely rise.
- Salt – ½ teaspoon, essential for flavor balance.
Flavorful Add-Ins
- Chocolate Chips – 1 cup (choose semi-sweet or dark for depth).
- Sprinkles – Optional, but who can resist that extra festive touch?
Gather these ingredients, and you’re all set for a delightful baking adventure! If you’re looking for inspiration on variations or additional tips, check out this helpful guide on baking from The Joy of Baking. Happy baking!
Step-by-Step Preparation of Christmas Cookie Bars
When the holiday season rolls around, the kitchen becomes a hub of delicious activities, and what better way to spread joy than by baking Christmas Cookie Bars? These treat-filled squares are not only festive but also incredibly easy to make. Let’s walk through the preparation step by step!
Gather and Measure Ingredients
To ensure a smooth baking process, start by getting all your ingredients together. Here’s what you’ll need:
- 2 cups of all-purpose flour
- 1 teaspoon baking powder
- ½ teaspoon baking soda
- ½ teaspoon salt
- ¾ cup unsalted butter, softened
- 1 cup granulated sugar
- ½ cup light brown sugar
- 2 large eggs
- 2 teaspoons vanilla extract
- 1 cup chocolate chips (or other favorites!)
- Optional: sprinkles for festive touches
Pro tip: Measuring out your ingredients ahead of time can save you from the chaos of scrambling in the middle of mixing!
Preheat the Oven and Prepare the Pan
Set your oven to preheat at 350°F (175°C). While that’s warming up, grab a 9×13-inch baking pan, and line it with parchment paper. This not only makes for easy removal but also helps to prevent sticking. Trust me; no one enjoys wrestling with cookie bars!
Mix the Dry Ingredients Together
In a bowl, whisk together the flour, baking powder, baking soda, and salt. This step is crucial as it ensures that your Christmas Cookie Bars rise evenly. A pinch here and a mix there can make a big difference!
Cream the Butter and Sugars
In a separate large bowl, beat together the softened butter, granulated sugar, and brown sugar until creamy. This should take about 2-3 minutes. The result will be light and fluffy—exactly what your cookie bars need for that melt-in-your-mouth texture. If you prefer to cut down on sugar, you can also explore alternatives like coconut sugar.
Incorporate the Eggs and Vanilla
Next, add in your eggs (one at a time) and the vanilla extract. Make sure to mix thoroughly after each addition so that all the flavors merge beautifully. Vanilla is often hailed as the secret ingredient that elevates baked goods—don’t skip it!
Combine Wet and Dry Mixtures
Now, it’s time to marry the two! Gradually add your dry ingredient mixture to the creamed butter and sugars. Mix until just combined. Over-mixing can lead to tough bars, and no one wants that during the holidays!
Add in Your Favorite Mix-Ins
Here’s where the fun starts! Fold in chocolate chips or any other mix-ins you adore. Think nuts, dried fruits, or even holiday-themed sprinkles to add a festive touch. The goal is to create something uniquely yours, so don’t hesitate to get creative!
Spread the Batter into the Pan
Once your batter is ready, pour it into your prepared baking pan. Use a spatula to spread it evenly to ensure uniform baking. This step ensures that each square has that delightful balance of chewy and gooey goodness.
Bake to Perfection
Slide your pan into the preheated oven and let those Christmas Cookie Bars bake for about 20-25 minutes. The edges should be golden brown, while the center remains a bit soft; it will continue to cook upon cooling.
Cool and Cut the Cookie Bars
After baking, remove your pan from the oven and let it cool down for about 15-20 minutes. Once it’s cool enough to handle, lift the bars using the parchment paper. Cut them into squares and serve! Enjoy them fresh or store them in an airtight container for a delightful treat throughout the season.
Baking Christmas Cookie Bars is not just about the end result, but the joy it brings, the memories it creates, and of course, the flavors that linger long after. Happy baking!
Variations on Christmas Cookie Bars
Looking to spice up your holiday baking with some deliciously creative Christmas Cookie Bars? Here are a few fun variations that will delight your family and friends, offering something for everyone’s tastes.
Funfetti Christmas Cookie Bars
Bring a splash of color to your festivities with these vibrant Funfetti Christmas Cookie Bars. Start with a classic cookie bar base but add in festive sprinkles for that joyful crunch and burst of sweetness. The best part? You can easily tailor the sprinkles to reflect the holiday theme or color palette of your celebration. These bars are not just tasty but also visually stunning, making them perfect for holiday gatherings. For a guide on the best baking sprinkles, check out Baking Like a Boss.
Chocolate Peppermint Cookie Bars
Indulge in the ultimate holiday flavor combination with rich chocolate peppermint cookie bars. Simply incorporate cocoa powder into your cookie dough and fold in crushed peppermint candies. The result? A melt-in-your-mouth, chocolatey treat with a refreshing minty finish that encapsulates the essence of the season. For an extra festive kick, top with a drizzle of white chocolate to create beautiful snow-like swirls.
Nutty Holiday Cookie Bars
If you love a crunchy texture, try these nutty holiday cookie bars! Adding chopped nuts like pecans or walnuts not only enhances the flavor but also boosts the nutritional value of your treat. Mix in some dried fruits, such as cranberries or apricots, for a delightful contrast. The combination of nutty and fruity adds depth that will surprise your taste buds. Besides, who doesn’t love that comforting, homemade feel?
These variations on Christmas Cookie Bars are sure to impress! Whether you prefer festive sprinkles or the rich taste of chocolate and peppermint, these recipes offer delicious ways to celebrate the holidays. Happy baking!
Baking Tips and Notes for Christmas Cookie Bars
Importance of Measurement Accuracy
When it comes to baking Christmas Cookie Bars, the devil is in the details. Accurate measurement of ingredients can make or break your festive treats. A kitchen scale can be your best friend, ensuring you get the perfect ratios every time. Even a slight deviation can affect texture and flavor, so don’t skimp on this crucial step. For a deeper dive into the importance of baking measurements, check out resources like King Arthur Baking which covers measuring techniques.
How to Keep Cookie Bars Chewy
You want your Christmas Cookie Bars to have that perfect chewy texture, right? One effective trick is to slightly underbake them. Remove your bars from the oven when they are just set in the center; they will continue to firm up as they cool. Additionally, using brown sugar instead of granulated sugar adds extra moisture, helping maintain that delightful chewiness.
Storage Tips
Proper storage can extend the life of your Christmas Cookie Bars. Place them in an airtight container at room temperature for up to a week, or freeze them for longer storage. Just make sure to layer parchment paper between bars to avoid sticking. For more tips on how to keep baked goods fresh, feel free to explore articles on The Spruce Eats.
With these tips in mind, you’re all set to impress friends and family with your delicious holiday baking!
Creative Serving Suggestions for Christmas Cookie Bars
Gift-Wrapping for the Holidays
When it comes to giving Christmas Cookie Bars as a present, thoughtful packaging makes all the difference. Use festive boxes or tins, lining them with tissue paper for a delightful touch. Personalize the wrapping with homemade tags—think simple brown kraft paper adorned with twine and a sprig of pine. Not only does this add a handmade feel, but it’s also eco-friendly. Plus, who doesn’t appreciate a beautifully wrapped gift?
Serving Platters and Presentation Ideas
Presentation can elevate your Christmas Cookie Bars from a simple treat to a centerpiece. Opt for a decorative platter or a rustic wooden board. Layer bars in a staggered manner, interspersed with festive sprinkles or edible glitter for a pop of color. Consider adding seasonal elements like cranberries or candied fruit for that extra holiday flair.
Pairing with Festive Beverages
To truly impress your guests, pair your delicious bars with festive beverages. Hot cocoa sprinkled with peppermint, spiced apple cider, or even a refreshing cranberry spritzer create the perfect companions to your Christmas Cookie Bars. Not only do these drinks enhance the flavors of your treats, but they also bring a festive vibe to any gathering. For more pairing ideas, check out expert tips from the culinary wizards at Bon Appétit.
With these creative serving suggestions, your Christmas Cookie Bars will be the talk of the holiday season!
Time Breakdown for Christmas Cookie Bars
Preparation Time
Making Christmas Cookie Bars starts with a delightful and engaging preparation phase that takes about 20 minutes. This is your chance to gather your ingredients, preheat your oven, and get everything ready. Consider putting on some of your favorite holiday tunes to set the mood. Need a quick refresher? Check out this guide for some helpful tips!
Baking Time
Once your mixture is ready, the baking time is around 25-30 minutes. Keep an eye on those delicious bars to ensure they turn golden brown. As they bake, your kitchen will fill with mouthwatering aromas that make it feel like the holidays have truly begun!
Total Time
In total, you’re looking at about 50-60 minutes from start to finish for your Christmas Cookie Bars. Perfect for a busy schedule, right? In less than an hour, you can treat your friends and family to something special. Enjoy every bite!
Nutritional Information for Christmas Cookie Bars
When whipping up a batch of Christmas Cookie Bars, it’s helpful to know the nutritional breakdown so you can enjoy them mindfully. Here’s what you can expect:
Calories
Each bar generally contains around 150-200 calories, depending on the size and ingredients used. This makes them a delightful indulgence, perfect for festive gatherings or cozy movie nights.
Protein Content
You can typically find about 2-3 grams of protein in each serving of Christmas Cookie Bars. While they’re not a major protein source, adding nuts can boost this slightly, making them a more balanced treat.
Sugar and Fat Content
These delicious bars are also rich in flavor, often containing about 8-12 grams of sugar and 6-8 grams of fat per serving. To keep it guilt-free, consider reducing the sugar or using healthier fat alternatives. For more insights on sugar alternatives, check out Healthline’s article on natural sweeteners.
Enjoy your baking, and remember—balance is key!
FAQs about Christmas Cookie Bars
Creating delicious Christmas Cookie Bars might raise some questions as you plan your holiday baking. Let’s tackle a few common concerns to ensure your baking experience is as joyful as possible.
Can I Substitute Ingredients in the Recipe?
Absolutely! One of the best things about baking Christmas Cookie Bars is the flexibility with ingredients. If you’re out of brown sugar, you can use white sugar with a little molasses for that rich flavor. Want to make it gluten-free? Substitute regular flour with a gluten-free blend. Don’t hesitate to swap in your favorite mix-ins, like white chocolate or dried cranberries, to customize these treats to your liking. For more inspiration on ingredient swaps, check out this guide on Baking Substitutes.
How Long Will Christmas Cookie Bars Stay Fresh?
When stored properly, your Christmas Cookie Bars can stay fresh for up to a week. Keep them in an airtight container at room temperature, away from direct sunlight. If you’re tempted to store them in the fridge, know that while it extends freshness, they may dry out a bit. To enjoy the best flavor and texture, try to keep them at room temperature.
Can I Freeze Cookie Bars for Later?
Definitely! Freezing your Christmas Cookie Bars is a fantastic way to preserve their deliciousness. Just wrap them tightly in plastic wrap, then place them in a freezer-safe container. They can last for up to three months! When you’re ready to enjoy them, simply thaw at room temperature or pop them in the microwave for a few seconds.
Feel free to ask more questions or share your own tips below, and let’s make this holiday season sweeter together!
Conclusion on Christmas Cookie Bars
Christmas Cookie Bars are not just desserts; they’re a delightful way to embrace the holiday spirit with family and friends. These easy-to-make treats bring warmth and festive cheer to any gathering, making them perfect for sharing. Whether you’re cutting them into squares for cookie exchanges or enjoying them with a cozy hot cocoa, their rich flavors will leave everyone asking for the recipe.
If you’re looking for an appetizing, seasonal twist on classic cookies, these bars are your answer! For additional inspiration, check out more ideas on Baking Basics or explore holiday traditions at Taste of Home. Enjoy your baking adventure!
PrintChristmas Cookie Bars: Easy Indulgence for a Festive Treat
Christmas Cookie Bars are the perfect festive treat that combines the flavors of the season in a delicious and easy-to-make dessert.
- Prep Time: 15 minutes
- Cook Time: 30 minutes
- Total Time: 45 minutes
- Yield: 24 bars
- Category: Dessert
- Method: Baking
- Cuisine: American
- Diet: Vegetarian
Ingredients
- 1 cup unsalted butter
- 2 cups all-purpose flour
- 1 cup granulated sugar
- 1 cup brown sugar
- 2 large eggs
- 1 teaspoon vanilla extract
- 1 teaspoon baking powder
- 1/2 teaspoon salt
- 2 cups chocolate chips
Instructions
- Preheat the oven to 350°F (175°C).
- In a large bowl, cream together the butter, granulated sugar, and brown sugar until smooth.
- Beat in the eggs one at a time, then stir in the vanilla.
- Combine the flour, baking powder, and salt; gradually stir into the creamed mixture until just blended.
- Fold in the chocolate chips.
- Spread the batter into a greased baking pan.
- Bake for 25-30 minutes or until a toothpick inserted in the center comes out clean.
- Allow to cool before cutting into bars.
Notes
- For more festive flavor, add chopped nuts or dried fruits.
- These cookie bars freeze well for up to 3 months.
Nutrition
- Serving Size: 1 bar
- Calories: 200
- Sugar: 15g
- Sodium: 150mg
- Fat: 10g
- Saturated Fat: 6g
- Unsaturated Fat: 4g
- Trans Fat: 0g
- Carbohydrates: 25g
- Fiber: 1g
- Protein: 2g
- Cholesterol: 30mg